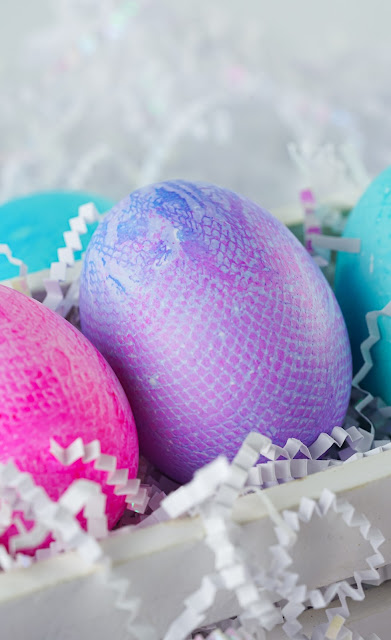
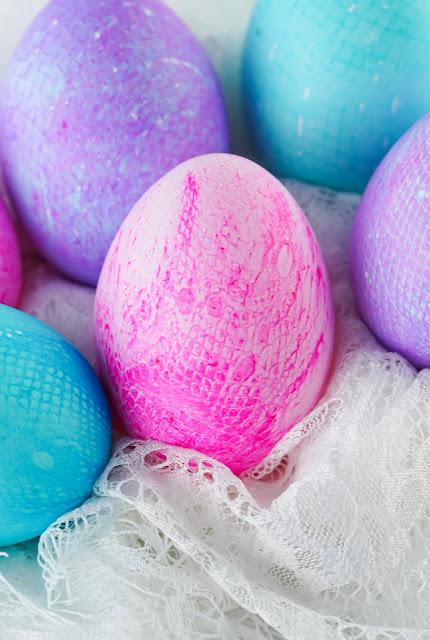
Learn how to make Lace Dyed Easter Eggs! Each egg turns out so beautiful and unique. Simple supplies and fun to make with kids of all ages.
This post may contain Amazon Affiliate links. Sweet Hazel Honey may receive a small commission for Amazon purchases made though these links at no cost to you. Thanks for your support!
Looking for more crafts, recipes, activities and other kid friendly ideas?
Follow me! Facebook, Pinterest or subscribe by email here!
If you're looking for a different way to dye Easter eggs this year, you'll want to give this a try!
These Lace Dyed Easter Eggs are absolutely gorgeous and so fun for the whole family to make.
If you're like me, you'll have these supplies in your kitchen and craft stash, making it super convenient to give these a try with your family. If not, make a quick trip to the thrift or dollar store and you'll be set! It’s fun to find the random materials that will work and the designs they will make.
This activity is best for ages preschool and up. The littles will need some help and supervision but they'll have such a blast.
I always test an egg beforehand, to check the amount of time it takes with the dye I'm using. We've used food coloring and egg dye purchased from the store, which can produce different results depending on how strong the colors are.
Keep scrolling for tips, process photos, additional easter activities and more!
Thanks so much for supporting a small business and visiting our family owned blog 💕
What supplies do you need?
- textured fabric pieces (lace, burlap, netting, poly mesh ribbon)
- hard boiled eggs
- egg dye (use your favorite, we used food coloring)
- rubber bands
- paper towels
- scissors
How to make:
Scroll down for measurements, instructions and printing!
Helpful tips:
- This method works for farm fresh eggs as well, but the color tends to turn out darker. You’ll want to test these before jumping in to see how long you should leave it submerged. It varies on the color egg being used.
- I used a thick lace, which actually was an old table runner from Amazon. I also used poly mesh ribbon from the dollar store. Any material that has a texture to it, with breathing holes should work. I do not recommend really thin material as it doesn’t work as well. I tried a thinner lace and it didn’t turn out. Thrift stores would be a great place to find unique material.
- You won’t be able to get the material to tightly rest against every part of the egg due to the shape, but with slight adjustments, you should get large parts of it covered. The success of the design rests on it being tight against the eggs as much as you can.
- It’s very important to pat dry the egg as soon as it comes out and then again before you undress it. This helps the dye from saturating too much and preserves the design better.
- I noticed the sharper colors like bright pink, purple and blue made better designs. Orange and yellow didn’t turn out.
More Easter crafts and activities you may like:
- Easter Bunny Treat Cups
- Easy Paper Easter Wreaths
- Easter Egg Marble Painting
- Handprint Bunnies
- Easter Egg Letter Hunt
I hope you enjoy this activity as much as our family did!

How to Make Lace Dyed Easter Eggs
materials:
- 6x10-inch textured fabric pieces (lace, burlap, netting, poly mesh ribbon)
- hard boiled eggs
- egg dye (use your favorite, we used food coloring)
- rubber bands
- paper towels
- scissors
steps:
- Prepare your egg dye. (I used homemade egg dye using food coloring, which can be very potent, so keep that in mind)
- Tightly wrap a material piece around your egg and secure it at the top with the rubber band. It’s important you get the material tight against the egg as much as possible.
- Dip the wrapped egg fully into your dye and leave for 15-30 seconds. It’s important you don’t leave it long. The more potent the dye, the less you’ll want to leave it in.
- Immediately rest on a paper towel and pat the outside dry.
- Leave to sit for about 2 minutes before gently cutting away the wrap.
- Immediately pat dry again and let rest for another 3 minutes to dry.
- Repeat the process for all your eggs.
Thanks so much for stopping by!
Around this time in blog history....
One year ago:
Looking for more crafts, recipes, activities and ideas?
Follow me! Facebook, Pinterest or subscribe by email!


Comments
Post a Comment