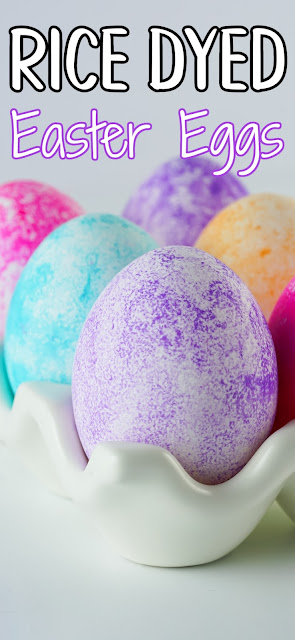
Learn How to Make Rice Dyed Easter Eggs! This method is simple, less mess and a great sensory activity. The eggs turn out colorful and so pretty!
This post may contain Amazon Affiliate links. Sweet Hazel Honey may receive a small commission for Amazon purchases made though these links at no cost to you. Thanks for your support!
Looking for more crafts, recipes, activities and other kid friendly ideas?
Follow me! Facebook, Pinterest or subscribe by email here!
This method of coloring Easter eggs is absolutely perfect for all the little kiddos!
It's simple, the mess is contained to the bags and kids love squishing the rice around the eggs to color them.
These Rice Dyed Easter Eggs are also fun, super colorful and beautiful! You can color as many eggs as you want with this method, just continue adding more food coloring to the rice when the color starts fading.
There's no risk of spilling cups of egg dye and you can let the kiddos use any color they love to do their eggs. We had some Easter stickers that we decorated some of the eggs with after they were done drying.
This is a great sensory activity as well. You could also identify colors and count the eggs for some learning fun. I highly recommend this and it really is fun for all ages. I have a 2 year old and 16 year old and they both enjoyed it.
Keep scrolling for tips, process photos, additional Easter activities and more!
Thanks so much for supporting a small business and visiting our family owned blog 💕
What supplies do you need?
How to make:
Scroll down for measurements, instructions and printing!
Helpful tips:
- If the color isn’t as bright as you'd like on the eggs, add a couple more drops of food coloring to the bag.
- I used gel food coloring, but I’ve had luck with water based dyes as well. Avoid oil based dyes as they tend to not grab onto the shell as well.
- This works for colored farm fresh as well, the color will just appear less saturated or in some cases, darker.
- I’ve used minute rice and regular rice and both worked, although I liked the minute rice more. Brown rice should work as well, if you have some on hand.
- You can do multiple colors, one after another. Just give it a couple minutes to dry in between colors for the best results.
More Easter activities you may like:
- How to Make Lace Dyed Easter Eggs
- Handmade Potato Easter Egg Stamps for Kids
- Easter Look and Find Sensory Bottle
- Plastic Easter Egg Baking Soda Science Activity
- Pom Pom Bunny Easter Plate Craft
- Easter Egg Bath
I hope you enjoy this activity as much as our family did!

How to Make Rice Dyed Easter Eggs
materials:
- White Rice
- Food Coloring
- Boiled Eggs
- Quart Ziploc Bags
- Disposable Gloves
steps:
- Decide how many colors you’re going to do and have one baggie per color.
- Place about a cup of rice in each baggie, about a ¼ full.
- Place four drops of the same color of food coloring in each baggie.
- Remove air from the bag and seal it before squishing the rice all around until the dye is distributed.
- Be sure your eggs are dry before choosing your color and placing the egg in the bag. Remove the air and seal the bag before gently moving the egg around in the colored rice until you’re satisfied with the color distribution.
- Remove eggs from rice wearing the disposable gloves. Refrigerate for about 2 hours until dry.
NOTES:
If the color isn’t as bright as you'd like on the eggs, add a couple more drops of food coloring to the bag.
Thanks so much for stopping by!
Around this time in blog history....
One year ago:
Looking for more crafts, recipes, activities and ideas?
Follow me! Facebook, Pinterest or subscribe by email!
.jpg)
.jpg)
.jpg)


.jpg)
.jpg)

Comments
Post a Comment